


Where to Place OWLTRA Electronic Rat Traps for Maximum Results
Executive Summary
OWLTRA Electronic Rat Traps can provide fast, humane, and highly effective rodent control — but only when they’re placed in the right locations with careful attention to environmental factors, safety, and rodent behavior. This in-depth guide brings together the latest manufacturer guidance, real-world testing, pest control best practices, and robust user feedback to help you achieve maximum results with the full OWLTRA trap lineup (models OW7, OW2, OW2-Plus, and OW1). We highlight how proper placement, device selection, and regular maintenance are crucial for high catch rates and long-term success.
Introduction
It’s the telltale scratching in your pantry at midnight. The gnawed corner of that dog food bag. Or the tiny dark trails appearing behind your basement shelving. Rodents are experts at quietly staking out territory in our homes and workplaces. When it’s time to take control, many turn to OWLTRA's innovative electronic traps — but simply placing a trap anywhere won’t do the trick.
Imagine setting up a mousetrap in the middle of a ballroom and expecting a shy, nocturnal guest to waltz right up to it. For OWLTRA traps to deliver on their promise of safe, powerful elimination, you need to think like a rat or mouse — tracing their invisible highways and hiding spots. In this comprehensive guide, we break down where, how, and why to place your OWLTRA electronic traps for the best possible outcome, so every trap is working as smart as you do.
Actionable Tips
Ready to outsmart your rodent adversaries? Here’s your comprehensive, field-tested blueprint for OWLTRA trap deployment:
1. Track Rodent “Runways”
- Look for Fresh Evidence: Examine baseboards, behind appliances, and in utility rooms, pantries, attics, or sheds for droppings, greasy marks, chewed packaging, or gnawing on wood or plastic.
- Follow Edges: Mice and rats almost exclusively travel along perimeters or under cover — place traps lengthwise with their entry flush against these structures.
2. Model-Specific Placement Strategies
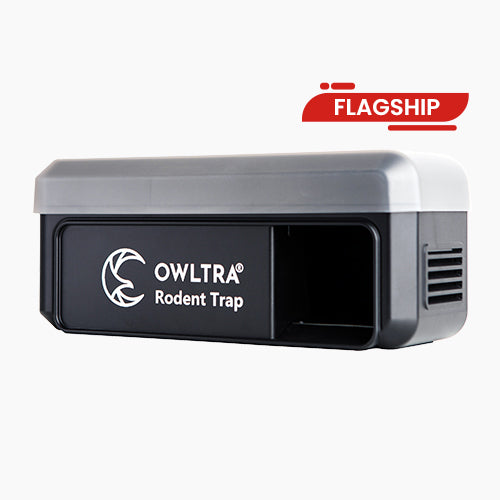
OW7 (Outdoor):
- Only use on concrete, brick, pavers, or on sturdy shelves just above ground level. Never on grass, loose soil, or where sprinklers may hit.
- Target patio corners, shed floors, or sheltered garage entry points.
- Routinely inspect for water exposure and clean after heavy rain.
OW2 & OW2-Plus (Indoor Mice):
- Slide behind refrigerators, stoves, or dishwashers where crumbs drop.
- Place in the back of pantry shelves or within food storage closets.
- If using the dual-entry Plus, position so both ends are accessible, increasing the likelihood of entrance.
OW1 (Indoor Rats):
- Deploy in garages, crawlspaces, or basements. Look for trail evidence and line up the longest side exactly flush with the wall.
- If rats are especially wary, try a few nights of “pre-baiting” (bait placed but trap unarmed).
3. Baiting and Scent Control
- Bait Placement: Always put bait (peanut butter is the gold standard) at the far end of the trap chamber, not near the entrance. This forces rodents fully into the killing zone.
- Wear Gloves: Human scent on traps or bait can deter catches. Disposable gloves are strongly recommended.
4. Optimal Coverage and Quantity
- In high-activity areas (visible droppings, recent sightings), use multiple traps every 2–4 feet along a runway. This mimics pest pro “zone coverage” for rapid results.
- For widespread infestations, rotate trap locations weekly if no action occurs, but avoid constant moving.
5. Safety and Maintenance
- Pet & Child Safety: Place traps where paws or fingers can’t reach — cabinets, behind appliances, or locked utility closets are best.
- Never set traps in open bedrooms, playrooms, or zones accessible to small pets (hamsters, rabbits, etc.).
- Check Weekly: Inspect, rebait, and check functionality (replace batteries if low; remove deceased rodents promptly).
- Environmental Cautions: Especially with OW7 (outdoor), guard against water ingress — an IPX4 rating does not equal waterproof.
6. Prevention of Common Pitfalls
- If no rodents are being caught: Reassess runway evidence — is the trap really in an active path?
- Avoid areas with excessive dust or debris where sensors may get blocked.
- Keep USB or power connectors out of the weather.
- Clean and inspect plates regularly to prevent residue buildup, especially in garages or dusty basements.
7. Quick Placement Blueprint
- Identify signs: droppings, rub marks, nests, or gnaw damage.
- Place trap so entry is flush or parallel to a wall or edge.
- For outdoor use, elevate on pavers or sturdy shelves; avoid wet zones.
- For indoor use, conceal behind or beneath appliances and away from foot traffic.
- Bait the rear of the chamber, use gloves, and arm the trap.
- Check, rebait, and maintain weekly for reliability.
Conclusion
The OWLTRA trap lineup brings cutting-edge technology to rodent control, but the real secret “ingredient” is knowing where — and how — to deploy these devices for consistent, humane, and safe results. Think like a rodent: follow their shadowy roads, conceal traps along their hidden highways, and stay vigilant about environmental challenges (water, dust, and curious pets). Respect the individual quirks of each OWLTRA model, and your traps won’t just be gadgets — they’ll be precision tools bringing swift relief in the struggle against unwanted pests.
In rodent control, knowledge truly is power. With these practical, expert-backed strategies, you’re primed to maximize every trap, every time.